
TLDR: Treat your blog like a smarter version of your portfolio: show the work you want more of, answer real client questions and tie everything to locations and services. Start with one recent session, one simple post and a workflow you can repeat, then decide if you want to keep doing it yourself or hand it off.
Do you have a backlog of finished galleries that never made it onto your blog?
“You should blog for SEO” sounds huge and vague, so it slides behind editing, shoots and life.
This guide shows you what to post, how to turn one shoot into a strong post, how often to blog and when to outsource.
Blogging for photographers: why it matters now (and what it actually is)
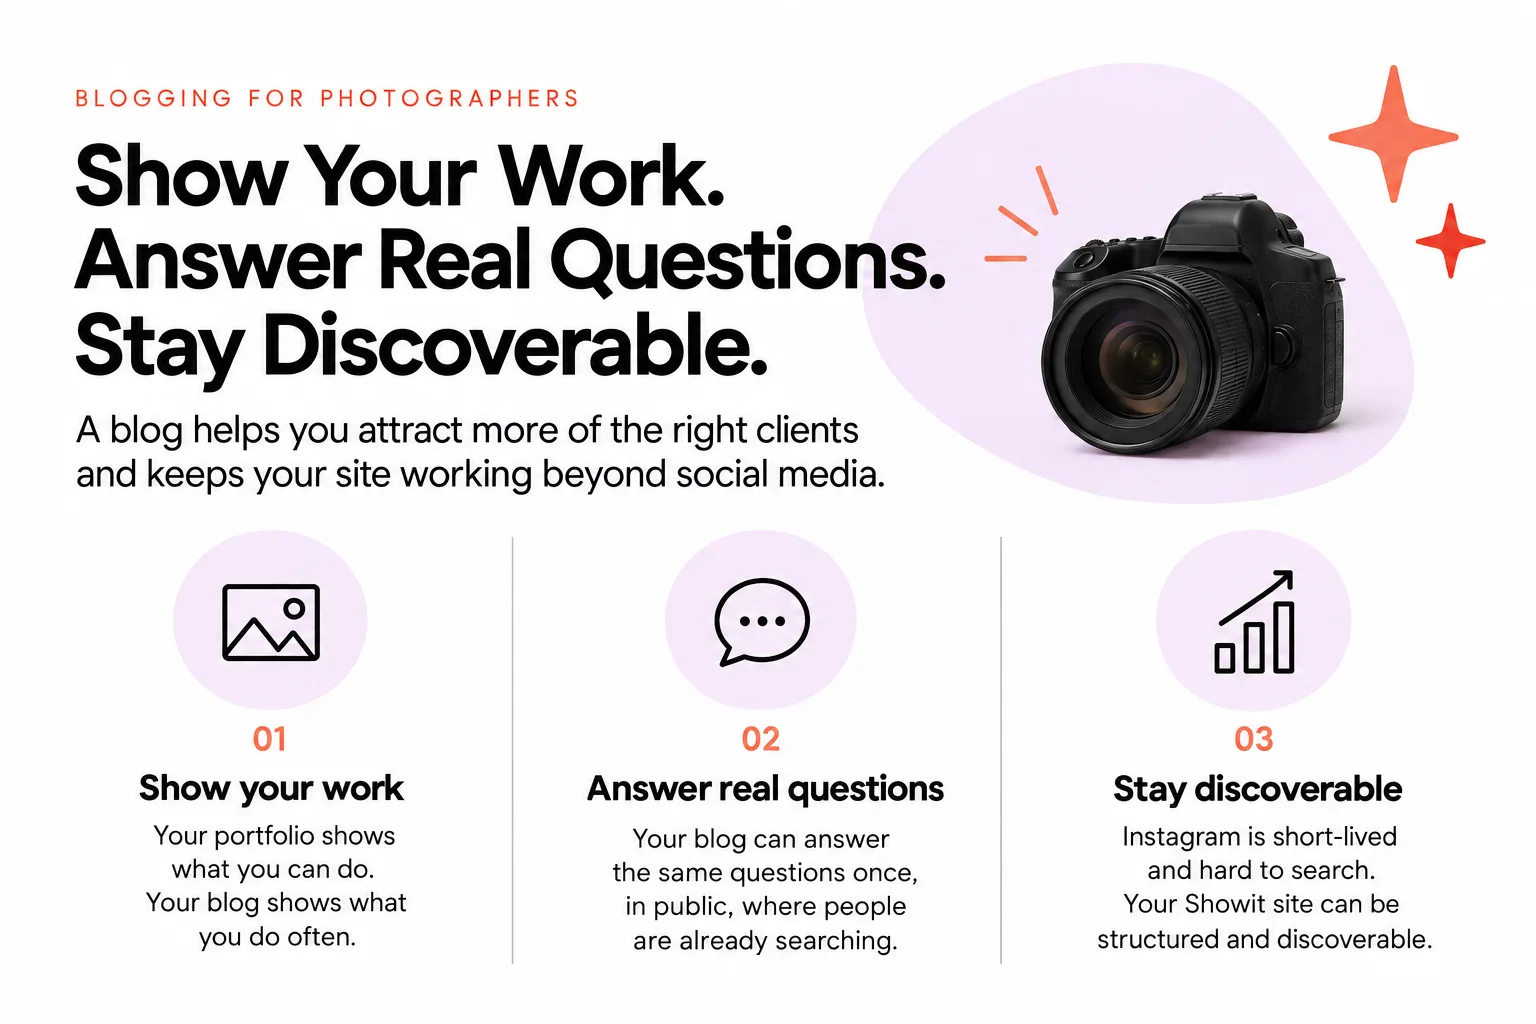
Blogging for photographers is using posts to do three things: show the work you want more of, answer your clients’ actual questions and keep your site active beyond social media.
That is it.
It is not writing long essays. It is not turning yourself into a “content creator.” It is simply putting your images and knowledge into a format that clients and search engines can actually find.
Here is why it matters for a working photographer with a Showit site:
- Your portfolio shows what you can do. Your blog shows what you do often.
- Your DMs and emails hold the same questions over and over. Your blog can answer them once, in public, where people are already searching.
- Instagram is short-lived and hard to search. Your website can be structured and discoverable.
Google’s own helpful-content guidance says content should be created for people first and demonstrate first-hand expertise, not just exist to tick an algorithm box. You already have that expertise. Blogging is how you surface it.
When you use your blog to talk about the shoots, locations and services you actually want to book, your site becomes a magnet for more of those clients instead of a static online brochure.

Step 1: Create your blogging strategy (and the services your blog should support)
A blogging strategy is just a set of decisions: who you want to attract, which services you want to book and what types of blog posts you will publish to support that.
Without those decisions, you sit in front of a blank screen and think, “I have no idea what to write.”
Start with three simple choices.
1. Choose your focus
Pick the main niche or service you want more of. For example:
- Weddings at specific venues or in certain regions
- Families in-home or on-location
- Branding sessions for small businesses
Choosing a clear niche makes everything else easier. It gives you a filter for ideas and keywords. When you sit down to write, you are not asking “what should I blog?” but “what should I blog that supports weddings / families / branding?”
If you shoot multiple things, choose one primary focus for now. You can always layer more later.
2. Use a hub-and-spoke structure
A simple structure that works very well for photographers is a hub-and-spoke approach.
You create:
- Broader “hub” posts on core topics
Examples:
- “What is wedding photography and what does it include?”
- “Camera basics for couples planning their engagement session”
- “Branding photography: what to expect and how to prepare”
- Then “spoke” posts that support each hub with specific related topics
Examples:
- A post for each venue you love shooting at
- A guide to one neighborhood where you do a lot of branding sessions
- Posts about specific timelines or lighting setups
The point is to fully cover the topics you want to be found for, instead of having 40 random posts that never connect.
Every time you publish a new spoke post (for example, a real wedding at a venue), you can link it back to the hub post about that type of photography. That helps both visitors and search engines understand how your content fits together. If you want a deeper dive on this structure for photographers, you can check out this guide to optimizing blog posts for photographers.
3. Build local content into the plan
Even if you call yourself a destination photographer, you still have key areas, cities or venues where you want to be visible.
Local content matters because clients often search things like:
- “Austin branding photographer”
- “Best Chicago elopement spots”
- “Family photographer near me”
So mix in posts that connect your work and expertise to specific places you want to book:
- Real sessions in those locations
- Venue or location guides
- Local resource posts
Local guides do not always have to be about photography. A post like “The best cafes in [your town] for client meetings” or a roundup of suburbs you shoot in can bring easy local traffic and still support your overall visibility.
4. Decide your core post types
Before you write a single post, decide what types of posts your blog will regularly include.
For most photographers, a simple mix looks like this:
- Real sessions (weddings, families, branding, elopements)
- Practical guides (what to wear, how to choose a location, how timelines work)
- Location / venue / city guides (places you actually shoot or want to shoot)
- Occasional local lifestyle posts (cafes, neighborhoods, season guides)
This is your strategy. You know who you are talking to, which services you are supporting, how your content will be structured and which post types you will repeat.
Now you need to decide what to post first.

Step 2: Decide what to post with core blog post types that book clients
The most effective blogging for photographers is built on a few core post types that you repeat.
Once you have your strategy, choose from these.
1. Real session posts (the backbone of your blog)
If you only post one type, make it this one. Real session posts show:
- The style of work you want more of
- The locations, venues or neighborhoods you want to rank for
- How you work with real people
The key is to connect each session to clear location, venue and style keywords rather than just “Sarah & Mike.” For example:
- “Summer rooftop engagement session in downtown Seattle”
- “Cozy in-home newborn session in Brooklyn Heights”
- “Branding photos for a yoga studio in San Diego”
These posts do the heavy lifting of attracting the right clients because someone searching for that type of session can actually find them.
2. “How to” and explainer posts
Use your clients’ questions as titles.
If people ask you:
- “What should we wear to our session?”
- “When is the best time of day for photos?”
- “How long does a branding session take?”
Turn each question into a helpful post. These make great hub posts in your hub-and-spoke structure and give you something to link to from your real sessions.
3. Location, venue and city guides
Location content supports your local visibility and helps hesitant clients make decisions.
Examples:
- “Best engagement photo locations in [City]”
- “A photographer’s guide to [Venue Name]”
- “Where to shoot branding photos in [Neighborhood]”
You can weave in your own images and experience. Clients love being able to see real examples of what a place looks like in photos.
4. Local lifestyle / resource posts
These are lighter posts that still help you show up locally.
Examples:
- “5 kid-friendly parks in [Suburb] for family photos”
- “Where to grab coffee near [popular shoot location]”
- “Rainy day date ideas in [City]”
They may not directly show your services, but they help people in your area find you and see you as a local expert.
With these four post types, you never have to stare at a blank page. Next, let’s walk through how to turn one real shoot into a single, search-friendly post.

Step 3: Turn one shoot into a search-friendly blog post
Turning a finished gallery into a blog post does not need to take all day.
Here is a simple process you can repeat for every session.
1. Choose the right session
Pick a recent shoot that:
- Reflects the work you want more of
- Took place in a location, venue or neighborhood you want to be visible for
- Has a clear vibe or story (sunset beach elopement, moody studio branding, chaotic fun family)
Do not overthink this. One solid session is enough.
2. Select a focused set of images
Selecting a focused set of images that tell the story of the session is more effective than uploading an entire gallery.
Aim for around 20–30 of your favorite images that:
- Show variety (wide, close-up, details)
- Highlight the location
- Reflect the emotional beats of the session
Many photographers currently throw images online with almost no information. That is frustrating to look at and not very effective. A huge, slow-loading gallery with no context does not help visitors understand what they are seeing or why they should inquire.
If you use a service like Fasta Blogging, you can upload around 20–30 favorite images and a small amount of information about the day, and the platform will automatically optimize those files for the web. It compresses large image files, converts them to web-friendly formats like JPEG or WebP and writes file names and alt text so those posts have a better chance of ranking. All these small technical touches add up, because image optimization and alt text are part of what helps photographers’ blog posts perform well in search.
If you are doing it yourself, you can still:
- Export web-sized versions instead of full-resolution files
- Rename files with simple, descriptive names (not “DSC_1234”)
- Add alt text that briefly describes each image
3. Write a clear, descriptive title
Your title needs to tell a stranger what this post is about.
Good titles mention:
- Session type
- Location or venue
- Key style or detail if relevant
For example:
- “Colorful fall family session at Greenlake Park in Seattle”
- “Modern branding shoot for a therapist in downtown Denver”
- “Intimate backyard wedding in Portland with DIY florals”
Avoid titles that only include names. “Ashley + Morgan” means nothing to someone who has never met them and is trying to decide who to hire.
4. Add a short intro paragraph
You do not need a long story. A short intro can:
- Set the scene
- Mention the location and type of shoot
- Highlight one or two details that matter to your ideal client
Think 3–6 sentences. That is enough.
5. Use a few helpful subheadings
On-page elements like titles, headings and internal links help search engines and visitors understand a page’s main topic. They also make your post easier to skim on a phone.
You can keep subheadings very simple, like:
- “About this [wedding / session]”
- “Why we chose [location]”
- “Tips if you are planning a [similar session]”
Under each heading, add 1–3 short paragraphs. Talk the way you would talk to a client. Explain why you chose the time of day, what made the location work well or what you would recommend to someone planning their own session there.
6. Add one clear next step
End each post with a clear next step for someone who is thinking, “I want this.”
For example:
- “Planning your own [city] [session type]? Reach out through my contact form to check dates.”
- “If you love [venue], I would love to photograph your day there too. Get in touch here.”
You do not have to overdo it. Just make it clear what to do next.
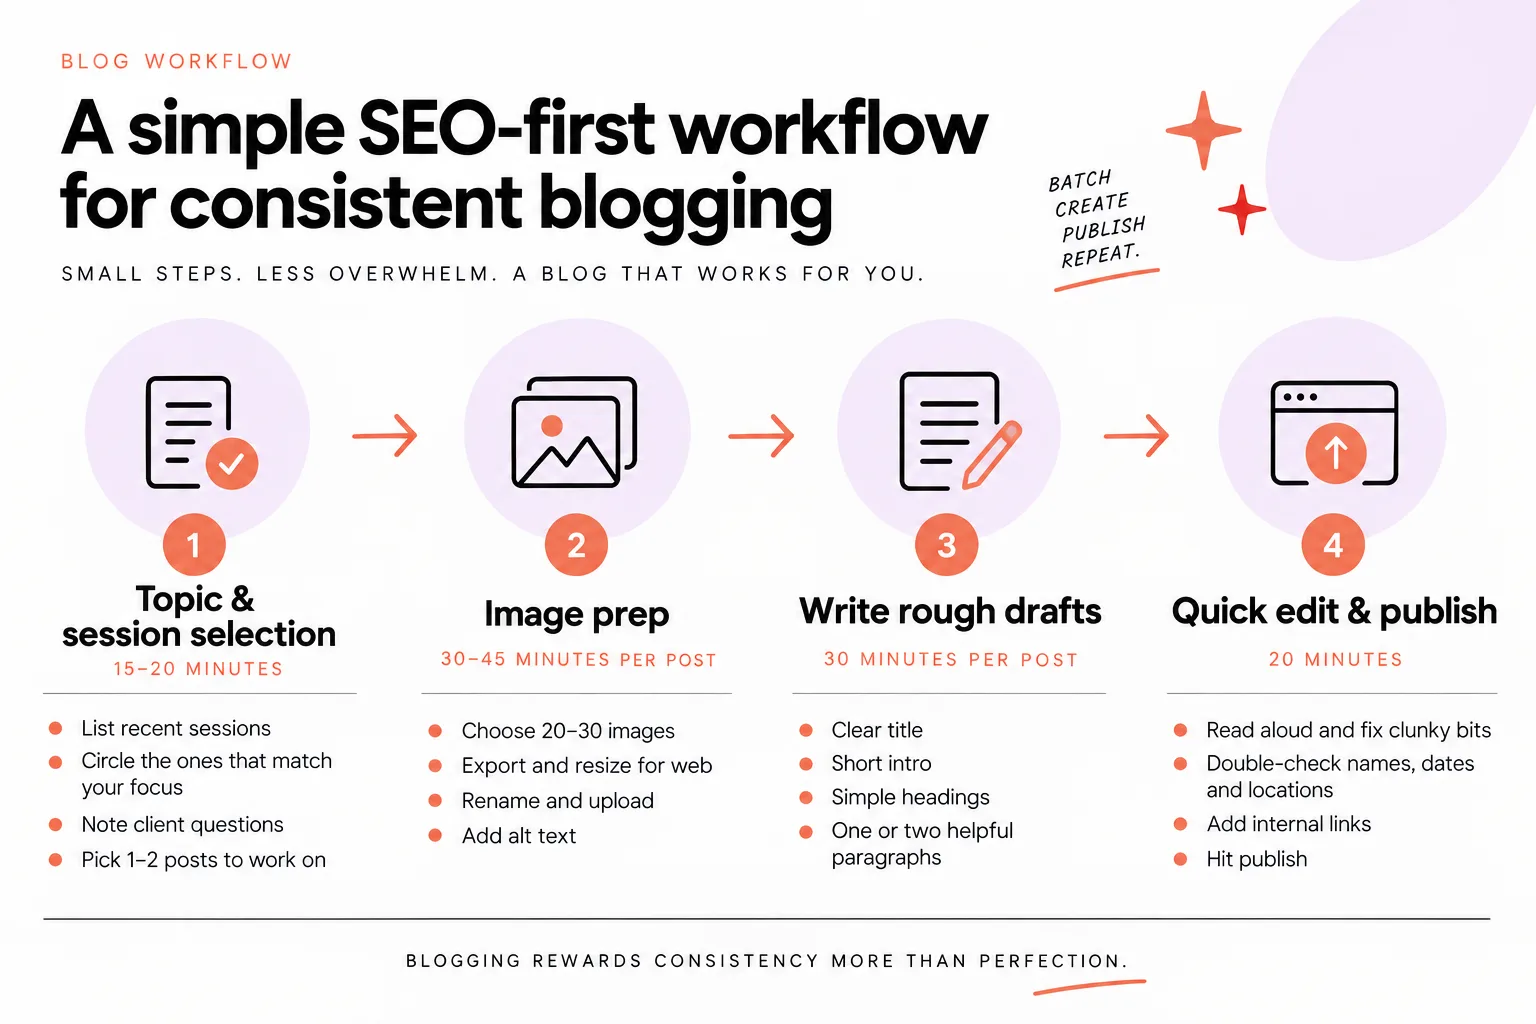
Step 4: A simple SEO-first workflow for consistent blogging
The only way blogging works is if you can actually keep doing it.
A realistic workflow fits around your shooting and editing schedule, not the other way around.
1. Batch similar tasks
Batching tasks makes blogging feel manageable, because you are not switching between culling, writing and uploading in one sitting.
You can:
- Batch topics: once a month, list out 4 post ideas based on upcoming or recent shoots
- Batch images: set aside one afternoon to select and export images for all 4 posts
- Batch writing: draft all four intros and headings in one block of time
- Batch uploading: schedule posts inside Showit or your blog platform on another day
When you treat blogging like you treat editing (with a set process and blocks of time), it stops feeling like a random chore.
2. Tie each post to a service and location
Before you start each post, quickly answer:
- Which service is this about?
- Which location / venue / city is this supporting?
This keeps your posts focused. It also helps you naturally use phrases people might search, like “family photos in [suburb]” or “branding photographer in [city].”
3. Reuse your work
Pull captions or text from:
- Instagram posts you already wrote about that session
- Emails where you explained how a certain type of shoot works
- Questionnaires where clients talked about how they found you or what they were nervous about
You are not starting from scratch each time. You are reshaping words and images you already have into a blog format.
If you want a deeper technical breakdown of on-page elements and blog structure, my SEO for wedding photographers guide walks through more of that detail, and most of it applies to other niches too.
Step 5: How often should photographers blog (and what “consistent” really means)
You do not need to publish daily to see value from blogging.
For most small and medium photography businesses, posting a blog once a week is a perfectly fine and realistic frequency.
That pace:
- Keeps your site fresh
- Gives you 4 new posts a month
- Is manageable alongside shoots and editing
Around eight posts per month would be the maximum effort I would personally bother doing at this point for a small business blog.
Larger enterprise brands or big software companies like Canva can justify posting every day because they have many topics and resources. That level of volume is not needed for small businesses.
With AI tools it is technically possible to publish blog posts every single day, but doing that for a small business can start to look like AI spam. Google is actively trying to filter out unhelpful, random AI blog posts and is hunting for low-value content that looks spammy. Google’s guidance on AI content says it rewards high-quality content however it was produced, but using automation mainly to manipulate rankings can violate its spam policies.
Google and AI search systems want human-based, experience-led content because they already have plenty of generic AI text and are always looking for the best, most helpful answers written from real experience.
Doing fewer, higher-quality posts can be more effective than churning out a mass of bad posts where you hope one or two perform. Your audience will be reading your content, so it needs to be good and genuinely based on your expertise, not just generic AI text.
So if once a week feels like a stretch, start with twice a month. The key is that “consistent” means “keeps happening,” not “perfectly every Tuesday at 9am.”

Common blogging mistakes photographers make (and how to avoid them)
A few common mistakes make blogging feel harder and less effective than it needs to be.
Here is what to watch for.
1. Image-only galleries with no context
Treating blog posts as image-only galleries without context or helpful information makes them less useful for search and for clients.
If your posts are just a scroll of 100 photos, with no words explaining where you were, what the session was or why it matters, you are making people work too hard.
Add:
- A clear title that names the session type and location
- A short intro that sets the scene
- A few notes about why the location or timeline worked well
- A call to action at the end
This alone makes your blog far more helpful.
2. Writing for other photographers instead of clients
It is easy to slip into writing for peers, especially if you are active in photography communities.
Remember that your ideal reader is a potential client, not another photographer. You can keep posts on camera settings and gear lists for your personal blog or private content if you like. Your main business blog should focus on client-facing topics.
3. Random topics that do not connect to your services
If half your posts are about your dog and your favorite recipes, your blog is not clearly about photography at all.
There is room for personality, but most of your posts should clearly support your offers and ideal clients. You can use the hub-and-spoke approach and your chosen post types as a filter. If an idea does not fit those, it probably belongs on Instagram Stories, not your blog.
4. Inconsistent posting followed by guilt
Blogging tends to be the first marketing task that gets pushed down the to-do list. Very few small businesses blog consistently, which suggests most people do not enjoy it or see it as just another task.
Instead of feeling guilty, be honest about what you can do. Set a schedule you can keep, or decide to outsource it so it actually gets done.
If you want help deciding between DIY and hiring someone, this list of best SEO companies for photographers can give you a sense of what different types of support exist.

Fasta Blogging: when to outsource your photography blog
Outsourcing your blog makes sense when you understand the value of blogging but realistically will not keep up with writing and optimization on your own.
Common signs:
- You have a backlog of beautiful sessions you meant to blog “one day”
- You feel drained at the idea of writing anything after a full day of edits
- You only remember your blog exists when someone mentions “SEO” in a Facebook group
There are lots of AI blogging tools on the market, but many of them are poor quality and essentially just automate basic keyword research into thin content. Publishing a high volume of low-quality AI blog posts is like putting your SEO on autopilot with weak fuel. It rarely leads to strong results because blogging still competes with other sites.
If you want done-for-you support that still reflects your own experience, Fasta Blogging might be a fit.
Fasta Blogging is a done-for-you blogging service built to bring clients to your website without adding to your workload. It is created and run by an SEO specialist with 9+ years of experience who focuses on quality content that supports your brand and business.
Here is how it works:
- Every post is built from your expertise, drafted with AI and reviewed by a human SEO specialist before it reaches you
- You get four SEO-led blog posts every month
- Fasta Blogging includes Google and AI search performance tracking
The goal is not to drown your site in content. It is to publish a steady stream of helpful, optimized posts that actually reflect your work and bring in inquiries.
If you only do one thing this month: your first blog post plan
If you only do one thing after reading this, do this:
Choose one recent session and turn it into a single, search-friendly blog post.
Here is your mini-plan:
- Pick a session you loved that reflects the work you want more of, in a location you want to shoot again.
- Select 20–30 images that tell the story without overwhelming people.
- Name your post with the session type, location and a simple descriptor.
- Write a 3–6 sentence intro explaining who it was for, where you were and what made it special.
- Add 2–3 short subheadings with a paragraph or two under each about the location, the experience or tips for someone planning a similar shoot.
- End with one simple call to action inviting people to inquire.
Once that post is live, you have proof that you can do this. From there, you can decide whether to repeat the process or hand it off to someone else.
FAQs
What should photographers blog about first?
Start with a real session that reflects the work you want more of, in a location you want to be found for.
Use that shoot to create a post that:
- Shows about 20–30 of your favorite images
- Clearly names the session type and location in the title
- Includes a short intro and a few notes that would help someone planning a similar session
This gives you an immediate, practical win and sets the template for future posts.
How often should photographers blog?
For most small and medium photography businesses, aiming to publish roughly one blog post per week is a solid, sustainable goal.
If that feels too heavy, start with twice a month. What matters more than volume is that each post is helpful, experience-based and tied to your services and locations, not just generic text.
Can one photo shoot turn into a blog post?
Yes. One shoot is more than enough for a strong blog post.
You do not need to share the full gallery. Choose a focused set of images, write a clear title and short intro, add a few simple subheadings and explain the things your future clients would care about: the location, the experience and how to plan something similar.
When should a photographer outsource blogging?
Consider outsourcing when:
- You understand that blogging can support your bookings
- You have no realistic plan or desire to write regularly
- You have a backlog of unblogged sessions and feel stressed or guilty about it
Outsourcing is a fit when you want your blog to actually work for your business but you know you will not keep up with writing and optimization consistently. A service like Fasta Blogging can take that work off your plate while still using your images and expertise.
If you want your blog bringing in more client inquiries without eating your editing time, you can let Fasta Blogging write your posts for you.


