Setting up your SEO correctly on your Showit website—or any website—is crucial.
Getting SEO right can make or break the success of your online presence. In this article, we’ll show you how to harness the power of Showit SEO to maximize your site’s visibility and reach.

Is Showit Good For SEO?
Yes, Showit is good for SEO! You can absolutely achieve great SEO results with Showit, making it a fantastic choice for your business. This platform allows for clean coding, fast loading times, and responsive design—all of which are key factors that search engines love.
To find out more about why Showit might be the perfect fit for your SEO needs, check out our detailed discussion on ‘Is Showit Good For SEO’
If you haven’t tried Showit yet, we’ve got a little something to get you started. Use this Promo code for a free month to explore everything Showit has to offer.
Showit Pricing and Recommendations
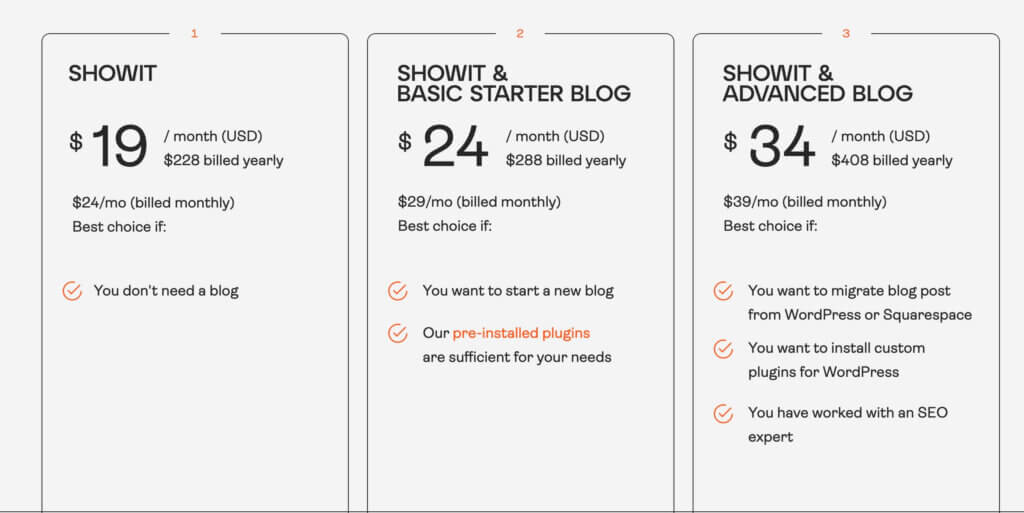
Showit offers a variety of pricing plans tailored to different needs, all detailed on their pricing page. For those serious about blogging and SEO, I recommend the Showit + Advanced Blog plan. This plan combines Showit’s powerful design tools with the robust blogging capabilities of WordPress, offering the best of visual creativity and SEO effectiveness.
With this plan, you get full WordPress integration, enhanced SEO tools through WordPress’s plugins, and customizable templates to design your site without any coding. It’s an excellent choice for content creators and businesses aiming to boost their online presence with high-quality, optimized content.
Showit Basic SEO Settings

1. Set Up Google Analytics
First things first: make sure you have analytics set up on your Showit site. This helps you see who visits your site and how they find you, which is super important for improving your SEO. For an easy step-by-step on how to get Google Analytics up and running, check out our guide: How to Add Google Analytics to Showit.
With analytics, you can keep track of what’s working and what’s not, and make smart changes to help more people find your site through search engines.
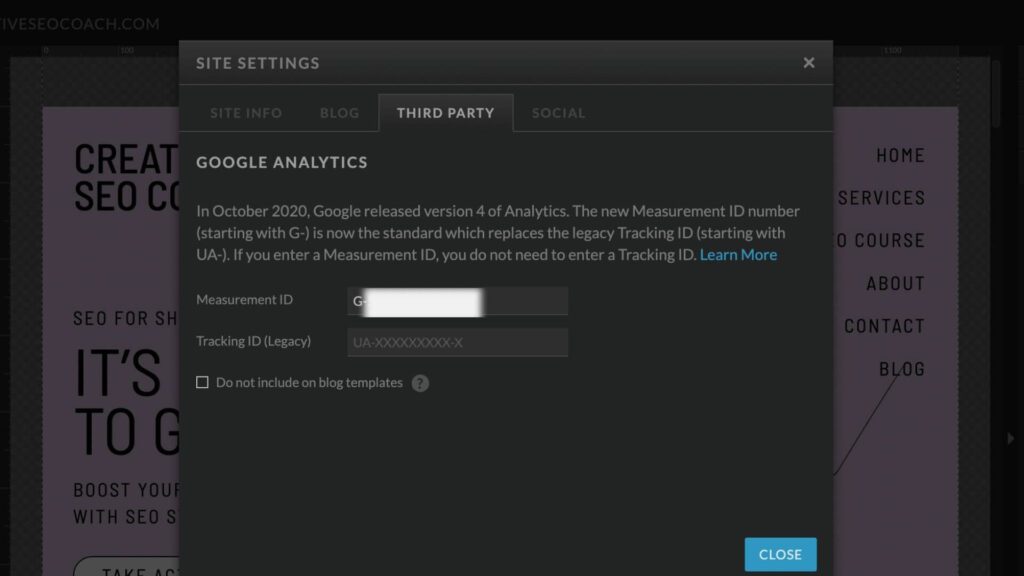
Location in Showit: Site Settings > Third Party
Instructions: First, create a Google Analytics account to obtain your unique “UA code.”
Once you have the code, just paste it into the Tracking ID box under Site Settings > Third Party in Showit.
For a detailed guide, check out our article on how to add Google Analytics to your Showit website.
2. Add a Favicon

A favicon, short for ‘favorite icon’, is a small, iconic image that represents your website. Typically, it’s displayed in the address bar of a browser, on the browser tab, and in bookmarks. It’s a crucial part of your website’s identity as it helps users easily identify your site.
It drives me crazy when people don’t do this. It’s not a make-or-break issue but makes your website appear more polished and trustworthy, so I recommend taking a few minutes to complete this.
Location in Showit: Site Settings > Site Info
How to Do It: If you haven’t created a favicon, you can easily create one using Canva or via a “Favicon Generator” on Google. Once you have your favicon, upload it in Showit by going to Site Settings > Site Info.
3. Design Best Practices for SEO on Showit
When designing your Showit website, it’s not just about how good it looks—it’s also about how well it performs. A clean and effective design can significantly enhance your site’s SEO by improving user experience and site speed. Here are some key design tips to keep in mind:
Font Choices
Font management is crucial for both aesthetics and website performance:
- Limit Font Variety: Every font and style you add to your site increases its page weight. To keep your site light and fast, stick to a few select fonts and minimize the use of different styles. This not only speeds up your site but also maintains a cohesive look.
- Consistency in Text: Avoid using multiple fonts within a single line of text, especially for content that includes your keywords. Search engines may interpret this as separate pieces of text rather than a continuous sentence, which can affect how your content is indexed. While Showit allows for creative text styling within one text box, it’s best to use this feature judiciously. For guidance on how to effectively use multiple fonts in one text box, check out our article: Using Multiple Fonts in One Text Box on Showit.

Color Contrast:
The colors you choose play a crucial role in accessibility and readability, both important for SEO and user experience. Ensure that the text and background colors on your site have enough contrast to be easily readable by everyone, including people with visual impairments. Use a tool like the Coolors Contrast Checker to verify that your color choices are both aesthetically pleasing and practical.
SEO Settings on Showit Pages
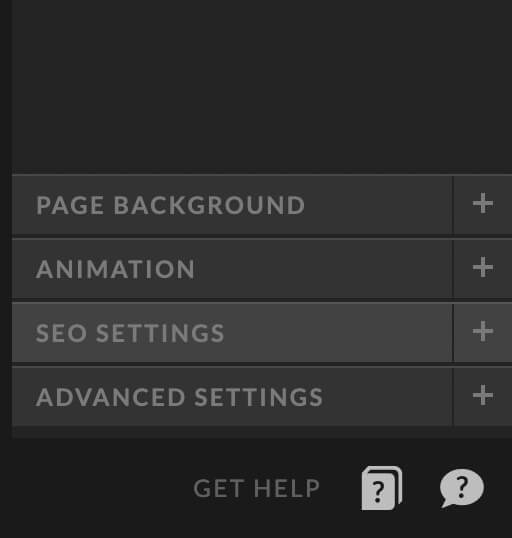
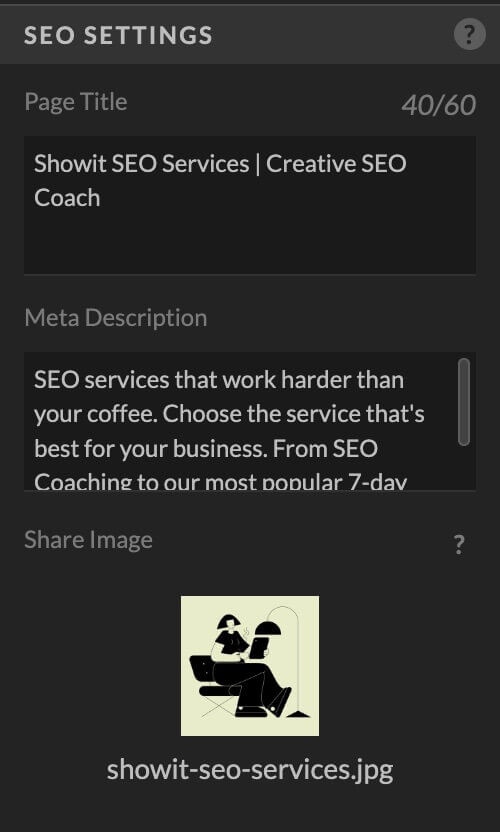
Every Showit page features a dedicated “SEO Settings” tab where you can tailor SEO elements critical for search engine understanding and visibility. Here’s what you can manage:
1. Page Title:
Carefully craft your page titles to ensure they’re optimized for both clarity and SEO. Use a SERP simulator to preview how your title might appear in Google. Keep your title around 55 characters to ensure it displays fully on most devices.
An example title could be “Hudson Valley Newborn Photographer – Joy Alexander Photography.” This format includes a primary keyword and your business name, ensuring clarity and relevance.

2. Meta Description:
Your meta description acts like a mini-ad for your page. Although it’s not a direct ranking factor, including the exact keyword can enhance relevance. We recommend searching your keyword on Google, reviewing the first-page results, and crafting a description that stands out yet remains informative. Aim for descriptions that are compelling enough to encourage clicks from the search results, typically between 140 and 160 characters.
3. Share Image
Choose an image that represents your page well for when it’s shared on social media.
4. Advanced SEO Settings
Under the “Advanced” tab, Showit offers further customization options:
- Custom Code: For advanced tracking and integration, consider using Google Tag Manager. This tool facilitates the management of tracking codes and related scripts without altering your site’s code directly. Learn how to set it up on your Showit site with our guide: How to Add Google Tag Manager on Showit.
- Non-Indexing: If you have pages that should not be indexed by search engines (like private content or specific legal disclaimers), Showit allows you to prevent indexing by checking the “Ask Google to ignore this page” option.
WordPress Blog Setting (For Blog Users)
Blogging is a powerful tool for engaging your audience and improving your website’s SEO. Showit seamlessly integrates with WordPress, allowing you to create and manage a blog within your website.
1. Selecting an SEO Plugin
- Automatic Inclusion of Yoast: When you start with WordPress on Showit, you’ll find that Yoast SEO is automatically included. It’s a popular SEO plugin that offers a range of features for optimizing your content.
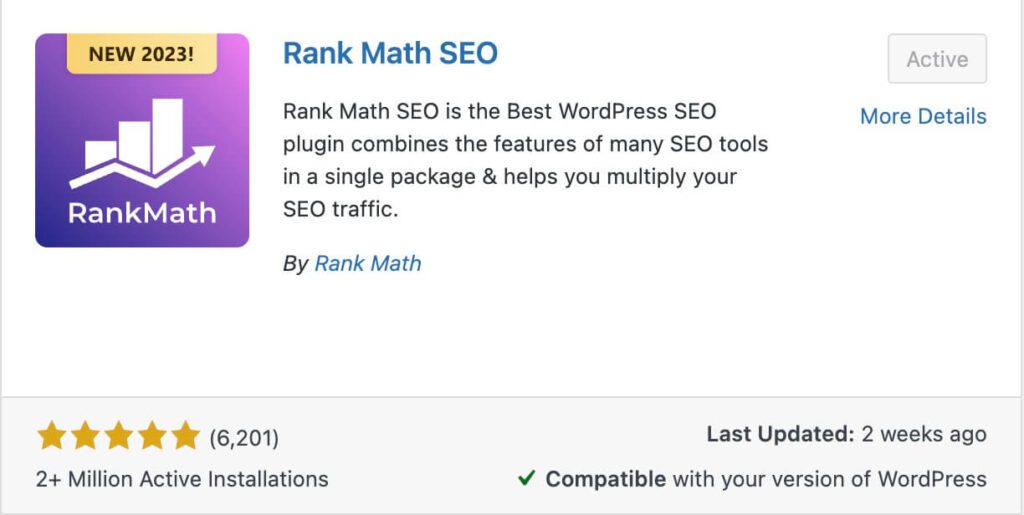
- Preferable Alternative – Rank Math: However, I personally prefer Rank Math for its advanced features and user-friendly interface. Rank Math offers detailed SEO analysis and suggestions that can be very beneficial.
- Important Note: Choose either Yoast or Rank Math, but not both. Having more than one SEO plugin can lead to conflicts and issues in your site’s SEO functionality. For a comprehensive guide on the best plugins for a Showit blog, including SEO plugins, check out our article here.
2. Setting Up Permalinks
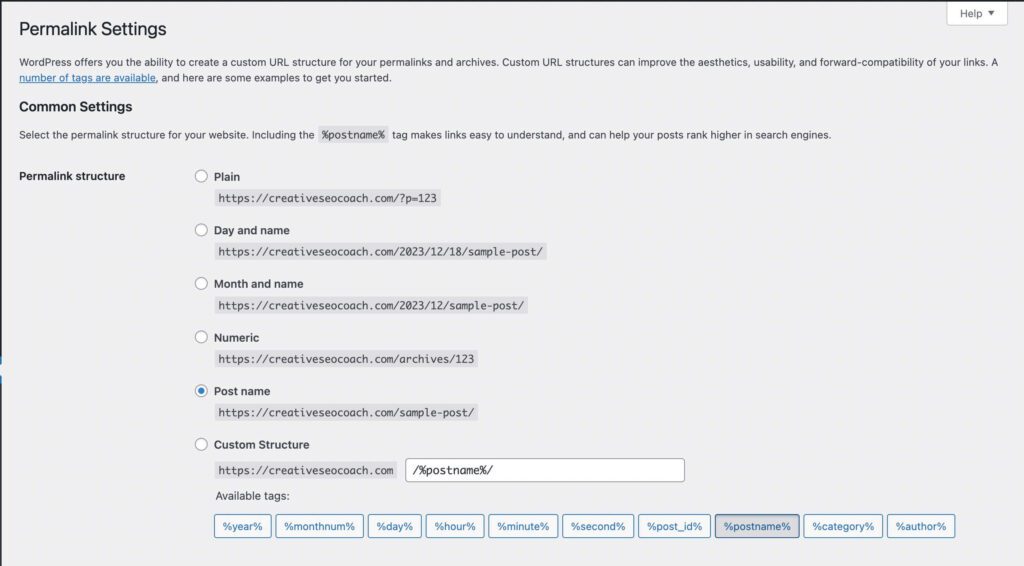
- Location in WordPress: Dashboard > Settings > Permalinks
- Why It’s Important: Permalinks are the permanent URLs to your individual blog posts, pages, and other content on your site. They are crucial for SEO as they help search engines understand the structure and content of your site.
- Recommended Setting: Change your permalinks to ‘Post Name’. This setting creates clean and simple URLs that are SEO-friendly.
- Step-by-Step Guide:
- Go to your WordPress dashboard.
- Navigate to Settings and then to Permalinks.
- Select the ‘Post Name’ option.
- ⚠️ Caution for Existing Blogs: If you have been blogging for a while or are migrating from a platform with a different permalink structure, be cautious. Changing permalink settings can break the links to your previously published content. In such cases, consider installing a redirection plugin like “Redirection” before making any changes. This will ensure that your old URLs are correctly forwarded to the new ones, maintaining your site’s integrity and user experience.
By carefully choosing the right SEO plugin and setting up your permalinks correctly, you can significantly improve your Showit blog’s SEO performance. Remember, these settings play a vital role in how search engines crawl and index your site, so it’s important to get them right.
Optimizing Showit Website Speed for SEO
Does Site Speed Affect SEO?
Yes, page speed is a crucial ranking factor for search engines like Google. A faster website offers a better user experience, making it more likely for Google to rank it higher. This is because a slow website can frustrate visitors, leading them to leave, which Google wants to avoid.
What Slows Down Your Showit Website
A few common elements can impact the speed of your Showit website:
- Heavy Images: Large image files can slow down your site.
- Animations: Though visually appealing, excessive animations can reduce speed.
- Third-party Tools: Tools like email platforms, analytics, etc., can affect loading times.
- Background Videos: Long videos playing in the background can be resource-intensive.
How to Find Out Your Site Speed
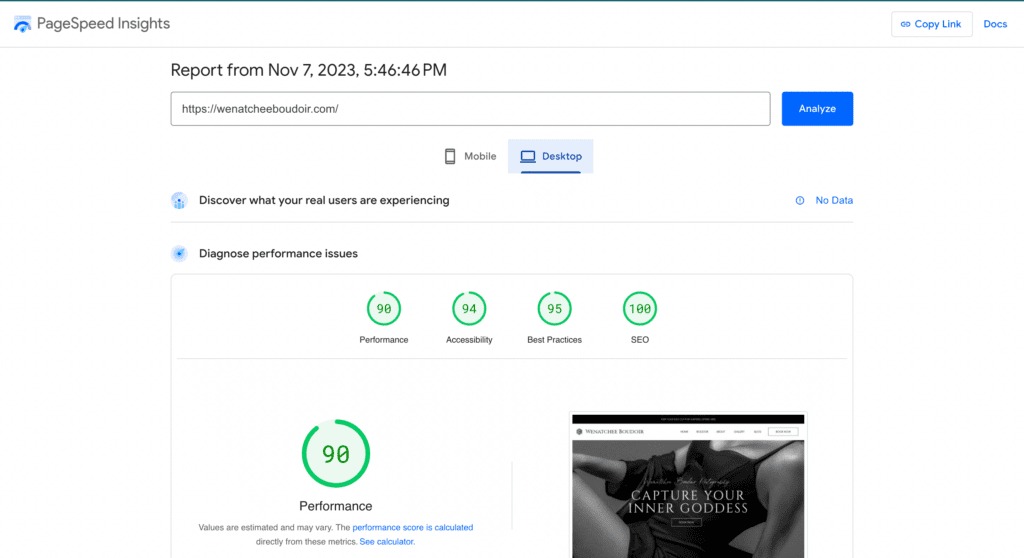
To measure your website’s speed, use Google’s PageSpeed Insights:
- Visit PageSpeed Insights.
- Enter your site’s URL and click “Analyze.”
- Run the test multiple times to get an average score.
- Aim for green scores in desktop results and avoid red scores in all areas.
Methods to Speed Up Your Showit Website
- Optimize Images:
- Use JPEGs for regular images and SVGs for transparent backgrounds.
- Resize images to the exact dimensions needed.
- Compress your images using tools like TinyPNG.
- Optimize Videos:
- Embed videos instead of uploading directly to Showit.
- Remove background audio from videos used as backgrounds.
- Limit the number of videos and use compression tools.
- Manage Redirects Efficiently:
- Keep redirects to a minimum.
- Use 301 redirects for permanent changes.
- Regularly audit and remove unnecessary redirects.
Remember, while you can’t use WebP images on Showit (as of now), focus on optimizing within the platform’s constraints. Check out our detailed guide on how to speed up your Showit website for more comprehensive tips and strategies.
Best Practices for SEO on Showit
When designing your website on Showit, it’s crucial to adhere to both aesthetic and SEO best practices. Here are some key considerations:
Ordering your Content is Important
What I am about to tell you is one of the most important and most overlooked parts of SEO on Showit. Get this part right and search engines will be able to easily understand your content. Get this part wrong and you can gain all the backlinks in the world, but search engines won’t make sense of your website.
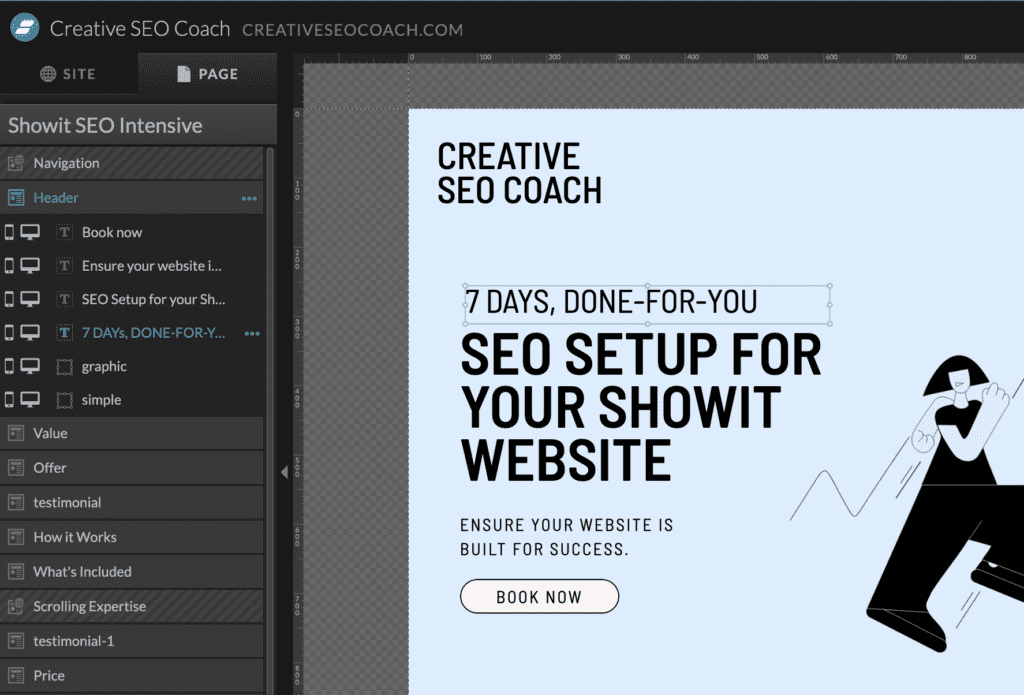
The order your content appears in Showit editor determines how a search engine reads your content!! Read it again, if you or your designer has paid no attention to the order of content in Showit editor, search engines are probably having a difficult time understanding your content. Annoyingly, the content at the bottom of the layer list will show up first. So whatever is at the top of the page in the design editor should appear at the bottom of the layer list in the left side panel. The order of the content on the page should be inverse to the order of the content in the side panel.
Use a tool like Textise so you can read your content like a search engine does.
Heading and Other Element Tags on Showit for SEO
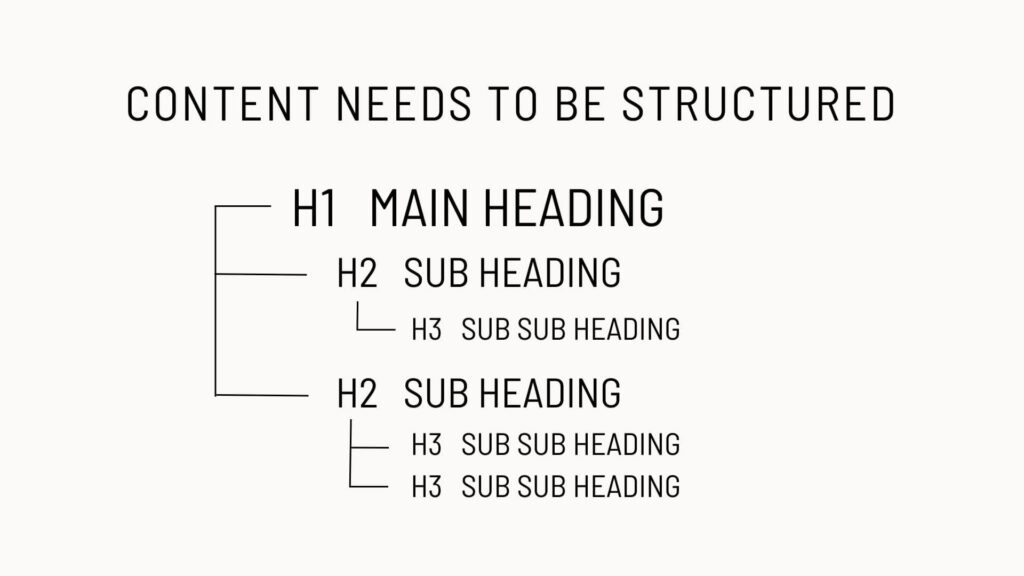
Utilize appropriate heading tags (H1, H2, H3, etc.) to structure your content hierarchically. Showit has the below options.
- div – Text design elements
- h1 – Heading 1 – Page titles
- h2 – Heading 2 – Canvas or blog titles
- h3 – Heading 3 – Any other relevant sub-heading titles
- nav – Navigation links
- p – Standard paragraph text
When you add a text box to Showit, it will automatically have a Text Tag applied to it based upon which style you choose when you add the text box.
This not only helps readers navigate your website but also assists search engines in understanding the importance and context of your content.
- Only use one H1 tag on each page – make sure it includes your main keyword for that page.
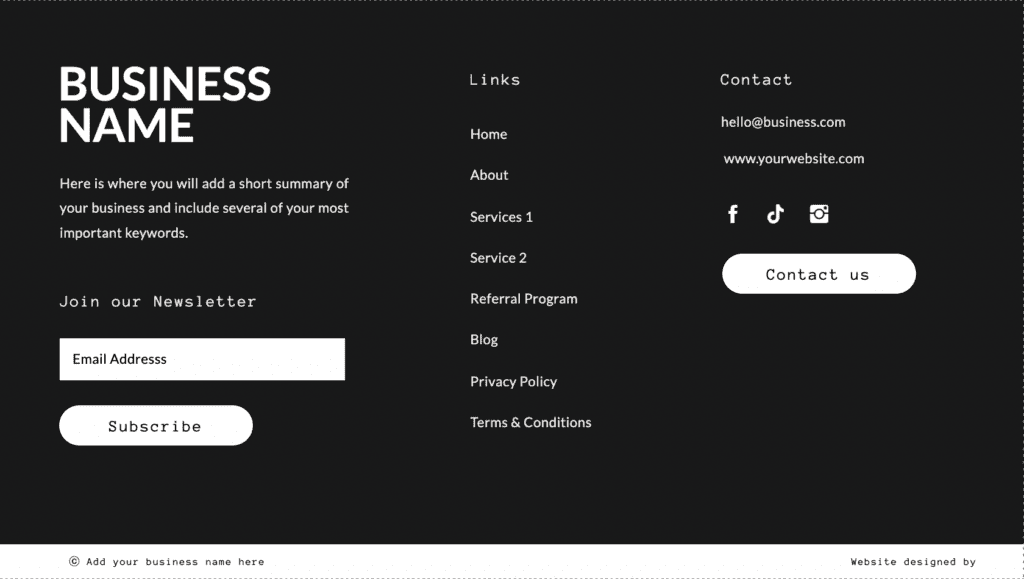
- All footer text should be marked as (p) for Paragraph
- Make sure you use ‘Nav’ for your main navigation aka menu
- Use <div> for any text such as big numbers
Mobile and Desktop Design Flexibility in Showit
One of the standout features of Showit is the distinct separation between its mobile and desktop design capabilities. Unlike platforms like WordPress and Squarespace, which rely heavily on responsive design that automatically adjusts your layout based on the device, Showit allows you to design your mobile and desktop sites independently. This gives you unparalleled control over how your site looks and functions on different devices.
Why This Is a Good Thing
Design Freedom: Showit’s approach provides a level of creative freedom that is rare in website building platforms. You can tailor every aspect of your site’s mobile and desktop appearances to suit specific user behaviors and preferences on each type of device. This means you can optimize your mobile site for quick information access and ensure your desktop site is rich with visual details and complex layouts that might be too heavy for mobile.
Important Consideration
While having the ability to design mobile and desktop versions separately offers great benefits, it’s crucial not to make them too different. If you hide an object on both mobile and desktop views, it will not be rendered in the final HTML of the page. This means it will be invisible not only to visitors but also to Google.
Moreover, when you hide an item from one device type (mobile or desktop), a CSS property called “display: none” is applied. While Google will still crawl, render, and index both versions of the site, it may de-prioritize objects that are frequently hidden with this property. This can affect how content is valued and ranked by search engines.
How to Optimize Your Showit Footer
Your Showit Website footer is prime real estate on your website. Ensure that you optimise it as much as possible. We have an in-depth article showing you how here: What to include in your showit website footer for SEO’ here.
In Conclusion
Getting Showit SEO right can really boost your website’s visibility and success. By setting up your SEO properly on Showit, you not only help more people find your site but also make their experience better. Keep working on your SEO steps, watch how they perform, and keep making them better. Every effort you put into your Showit site helps you move closer to your goals!
